10 Adobe Illustrator Tools Every Architecture Student Needs
Adobe Illustrator can be pretty daunting for beginners. The variety of tools and panels – as amazing as they are – need some time getting used to. But where do you start? The following 10 essential tools are for anyone starting out with Illustrator.
But first, what is Adobe Illustrator and why should I use it?
Adobe Illustrator is a graphics design software specially for vector graphics. Vectors are a type of image that are created using paths rather than pixels. This means they are quite different from a standard JPEG file type. A benefit of using a vector image is the scalability. Re-sizing and editing can be done easily and doesn’t leave you with blurry, pixelated images.
This is why Adobe Illustrator is preferred for logo design, illustrations and typography. For architecture students and alike, this software can be great for creating effective diagrams, maps and even simple perspective images.
1. The pen tool
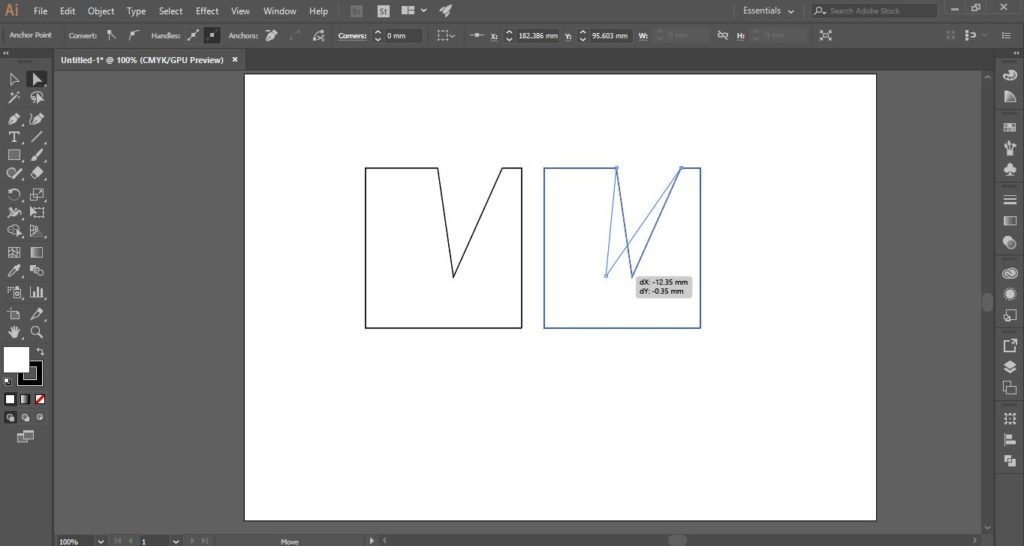
The pen tool is a versatile feature in Illustrator and can not only be used to create all sorts of shapes but also to trace hand-drawn sketches and effectively create quick and editable drawings. By using the Direct Selection Tool (a.k.a. the white mouse) you can easily edit the anchor points and any Bezier curves.
Here are some examples of ways to use the pen tool:
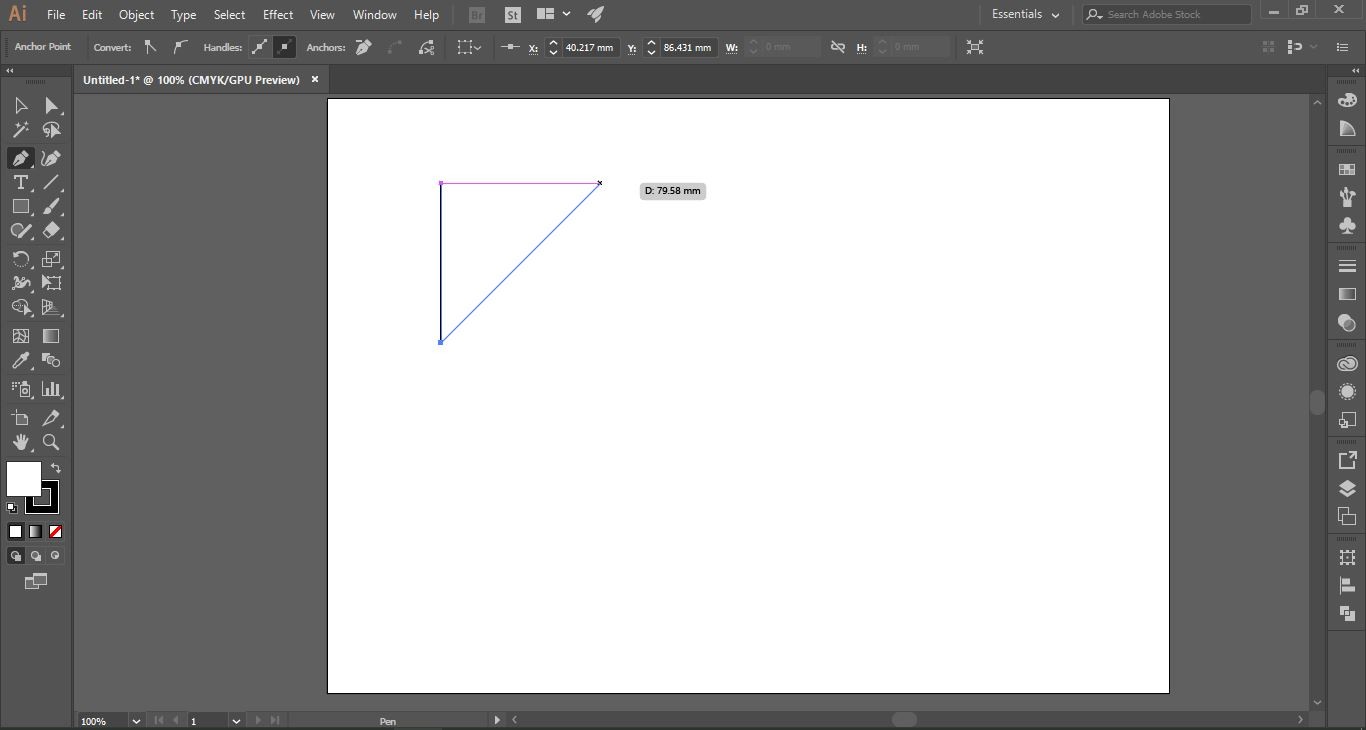
Using the Pen Tool (P) hold down Shift to create straight lines at 0, 45 and 90 angles.
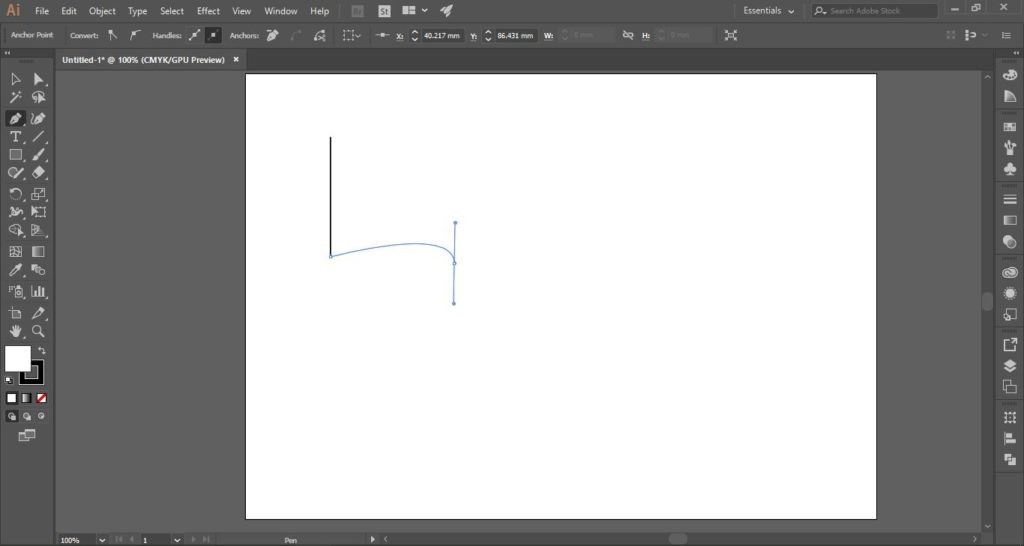
Using the Pen Tool (P) click to start a point, then click, hold and drag to create a curve.
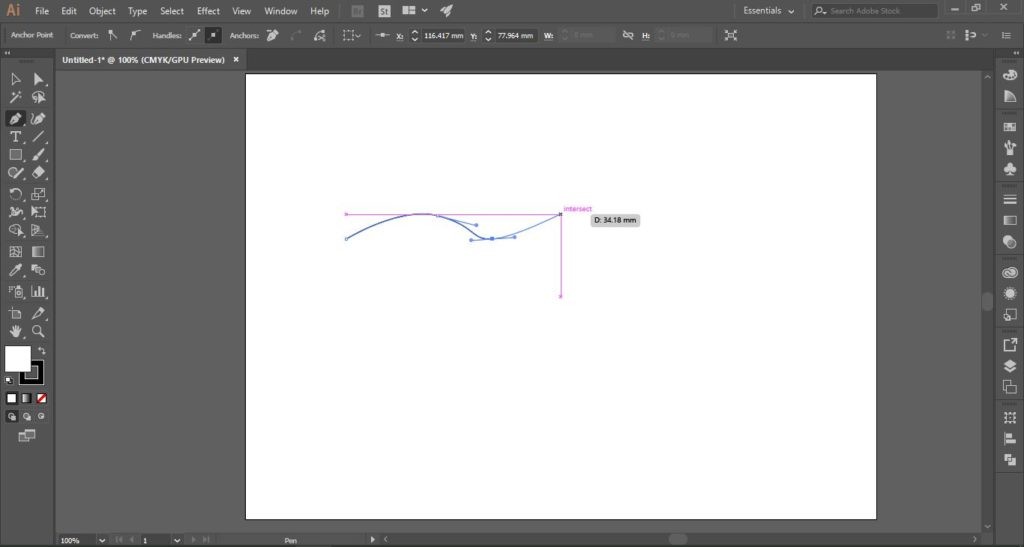
If aligning points, make sure to turn on Smart Guides by going to View > Smart Guides.
To edit shapes after they are closed, use the Direct Selection Tool (A) and click on one point to isolate, or drag over more and move to the desired position.
2. Type tool – and it’s extra bits
Many people use the type tool to simply add text to an illustration or drawing, but Illustrator allows you to do much more. This is particularly useful for typography and logo designers but can be a useful tool overall.
By holding down on the type tool, you can see the list of different options such as Type on a Path Tool and Vertical Type Tool.
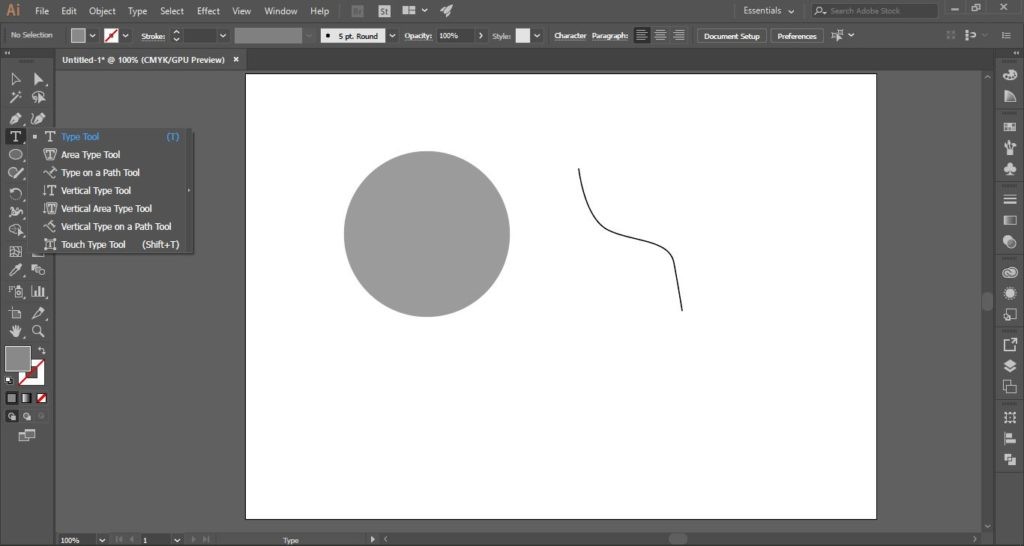
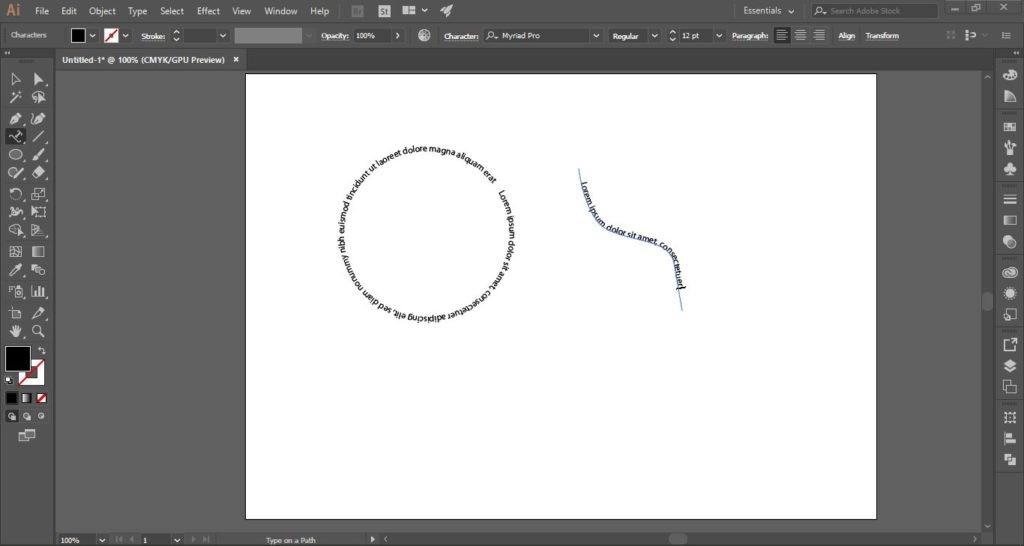
Creating text around a shape or path can be done by holding down the Type Tool (T) > Type on a Path Tool.
Then make sure to click on a path that has no fill or stroke. This can be done for the standard shapes or by making one of your own. It’s also not limited to lines and curves.
*Make sure to click exactly where you want the text to start on the path.
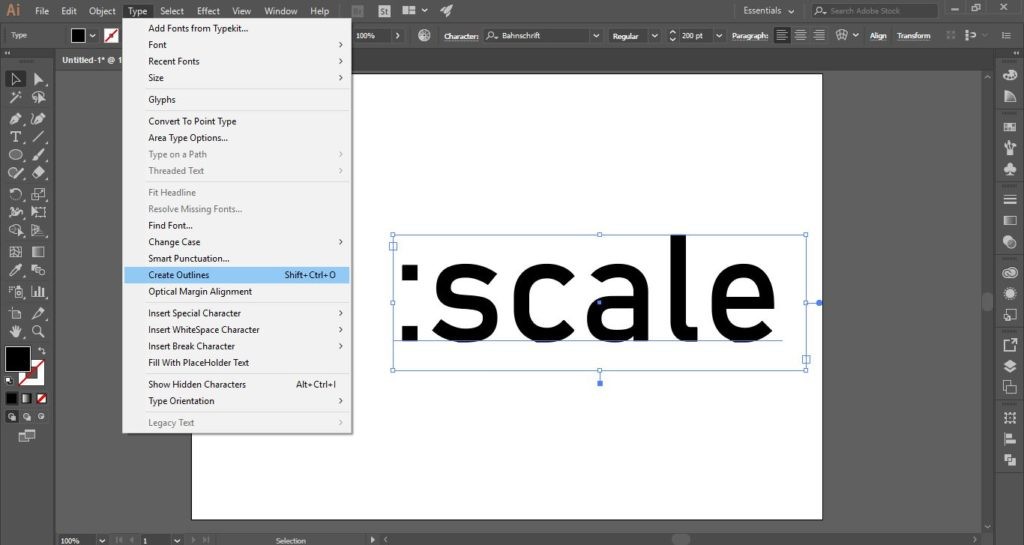
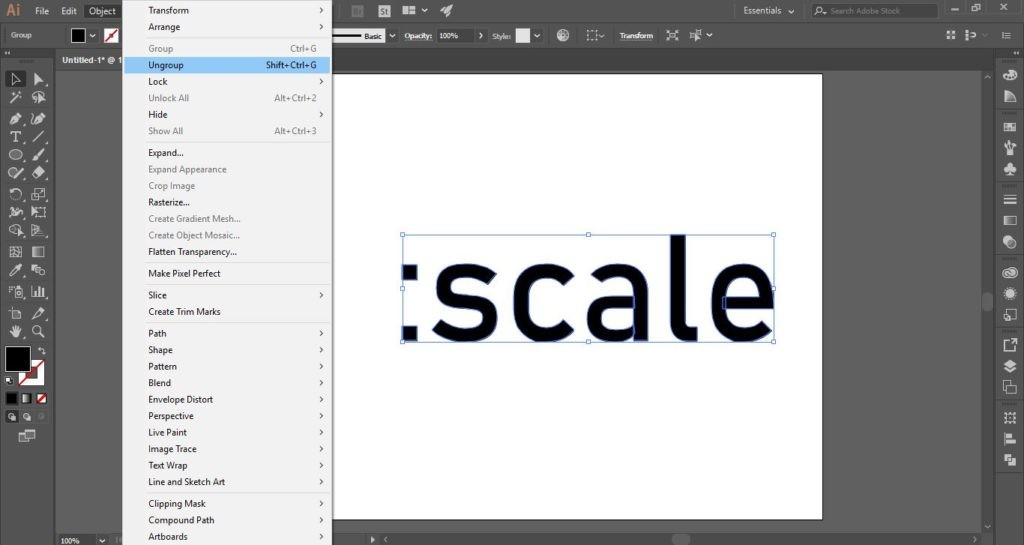
Another great feature is to convert a text into outlines. Illustrator allows you to treat a letter or word as a group of shapes rather than text which can then be modified.
First type out the word or letters in the desired font (don’t worry about the size) and then go to Type > Create Outlines. To separate each letter, you can select everything using the Selection Tool (V) and go to Object > Ungroup (Shift + Ctrl + G)
3. The Paintbrush Tool
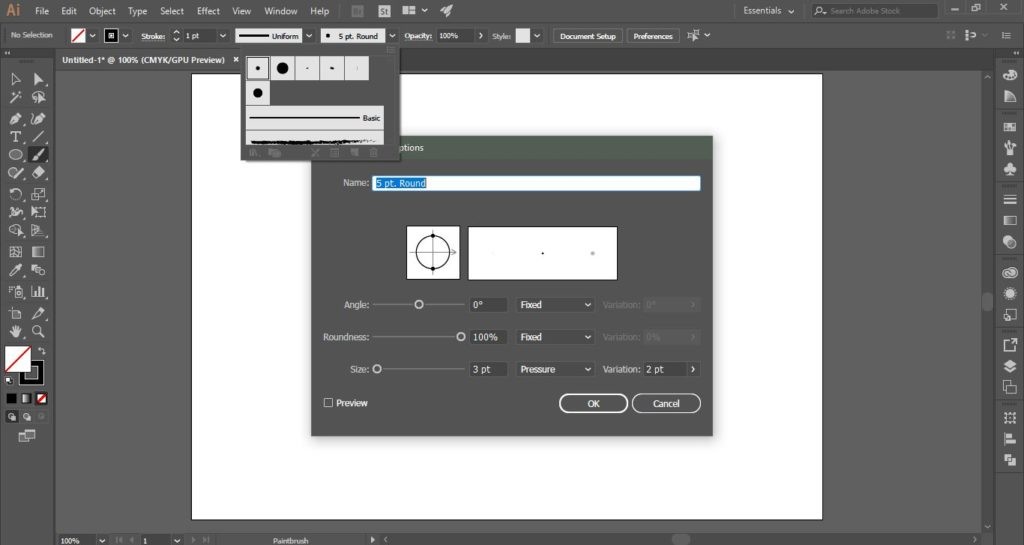
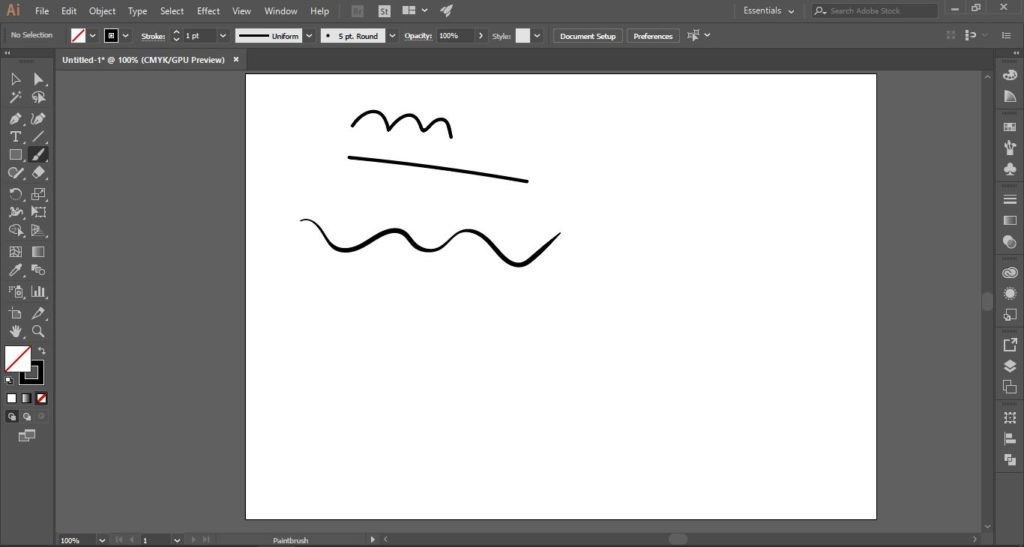
This tool is quite effective for those with a graphics tablet. It allows your strokes to be vectorized and used as shapes to essentially create amazing illustrations. With pressure sensitivity turned on you can create a varied line in a matter of seconds.
4. Layers are your best friend
The layers panel is probably the glue that holds Adobe Illustrator together. It is extremely essential when creating any kind of graphic. There are many small features within this panel that are important to unpack.
For example, let's say you forget to create your layers, but want to separate each shape or object on to its own layer. Select the shape, and in the layers panel click on the small square on the right-hand side. Then drag this up to move the shape on to its own layer without affecting the artwork.
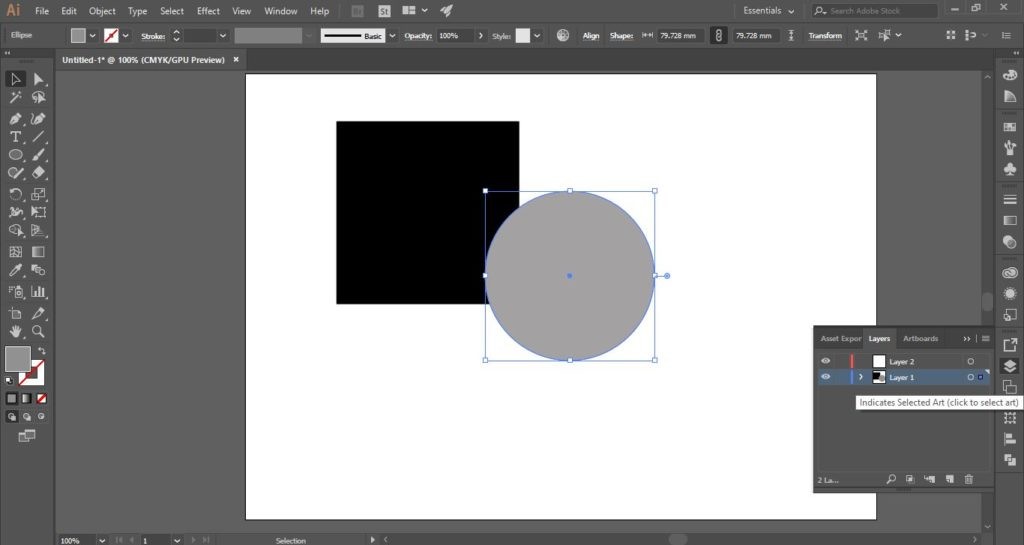
You can also drag and drop layers to move shapes in front or behind one another. It is a good habit to name all your layers so that they are easily accessible.
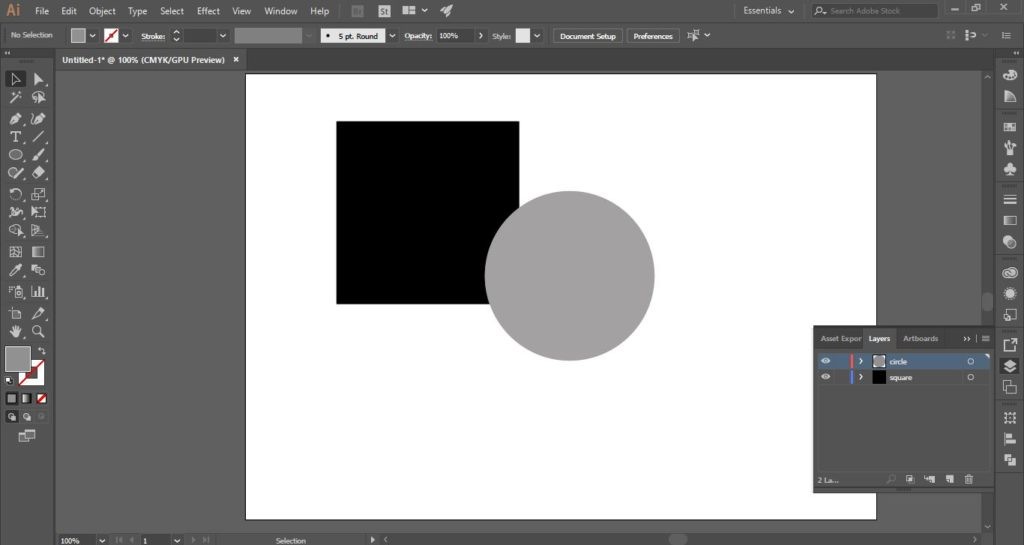
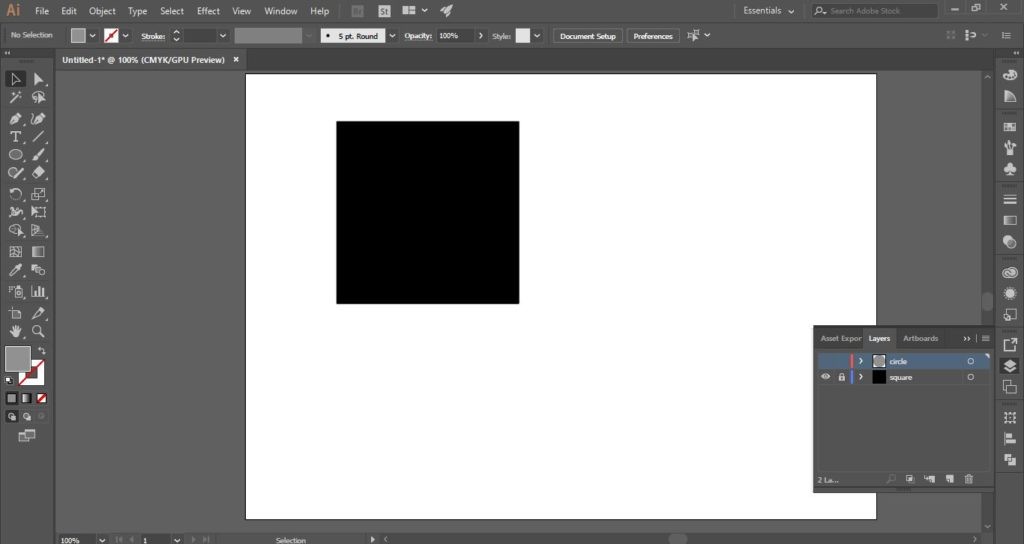
To lock or hide layers you can click on the lock shaped icon and the eye icon respectively. This can be useful when you don’t want to mess-up a specific layer and work on top or when you want to try things out and not have other layers interfering.
5. Live paint
Although this may seem like one of the more complicated tools in Adobe Illustrator, it is a highly useful one for adding colour to images quickly.
Have your line work art or shape ready. Use the Selection Tool (V) to select everything you want to colour and go to Object > Live Paint > Make.
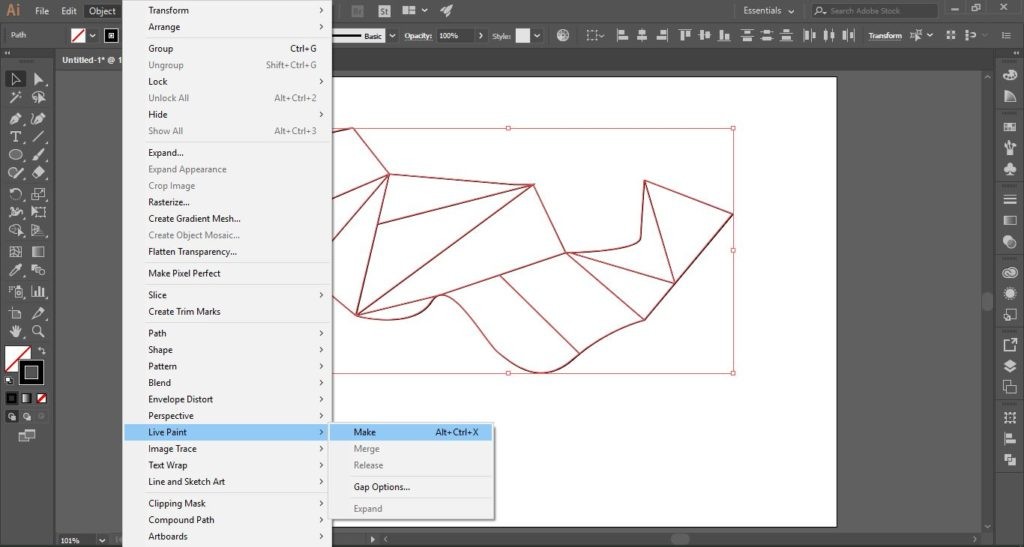
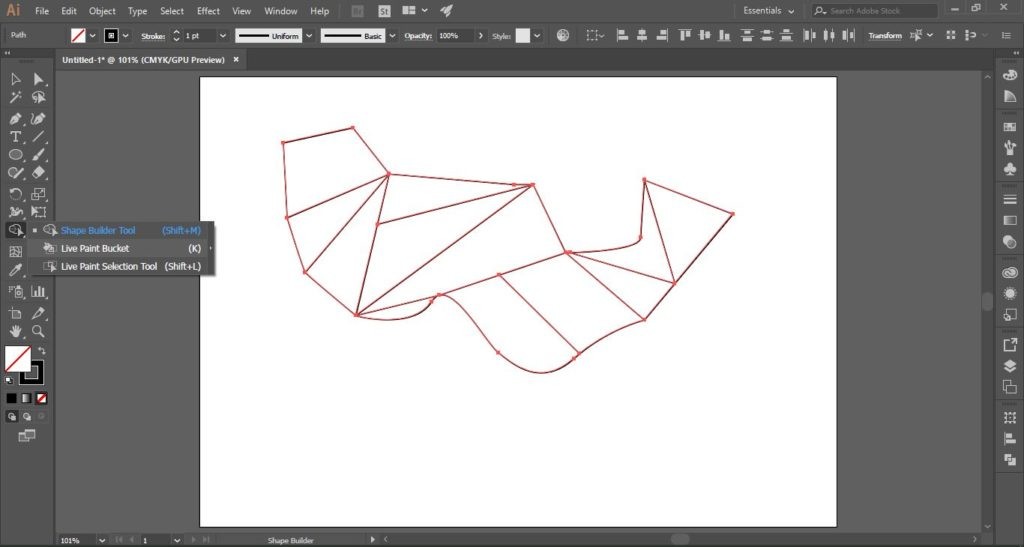
Then use the Live Paint Bucket Tool (K) which is hidden under the Shape Builder Tool and choose a colour. The areas highlighted in red are ones you can colour in. If you try to colour elsewhere you get an error box.
At the end, make sure to Expand everything. This can be done by selecting everything using the Selection Tool (V) and clicking on the expand button or going to Object > Live Paint > Expand. If you missed any areas that cannot be used with the Live paint tool, you can always select and Merge by going to Object > Live Paint > Merge and go back and paint them.
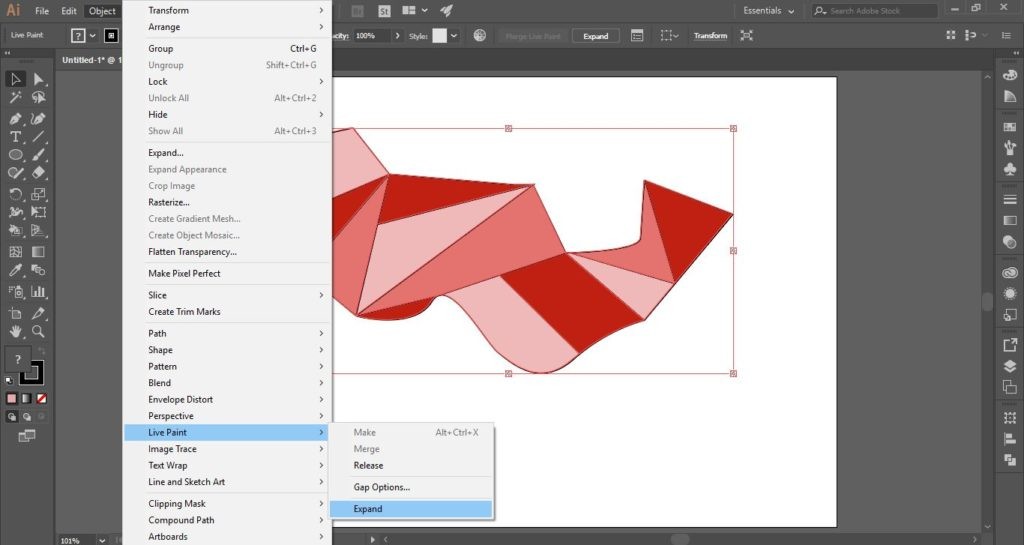
You can also get rid of the strokes to get a clean, line-less finish.
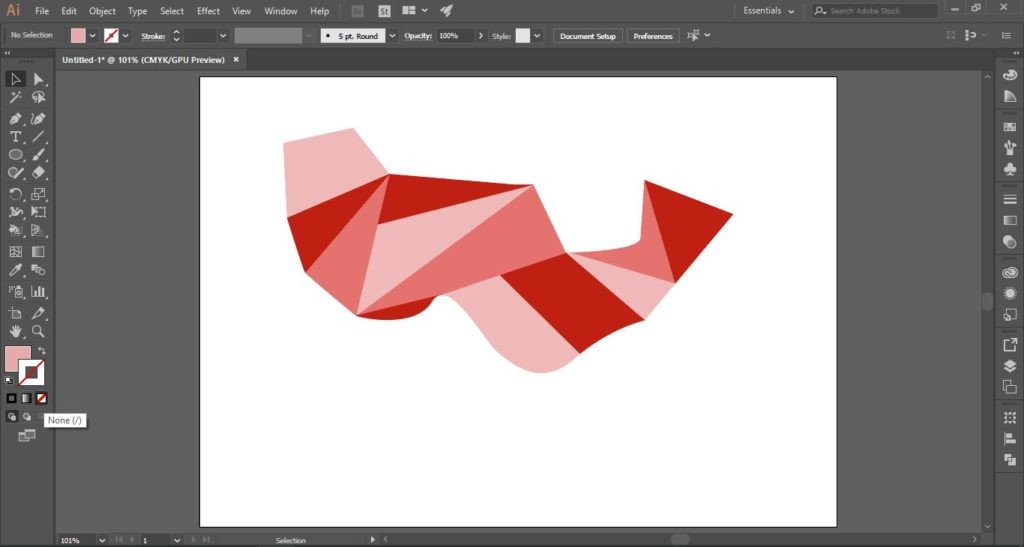
6. Swatches
Swatches are useful when you have a certain colour palette you want to stick to. Incredibly useful in logo designing or to create a tone within your artwork. To create a swatch, you can go to Window > Swatches and create a new swatch with the colour you have already selected.
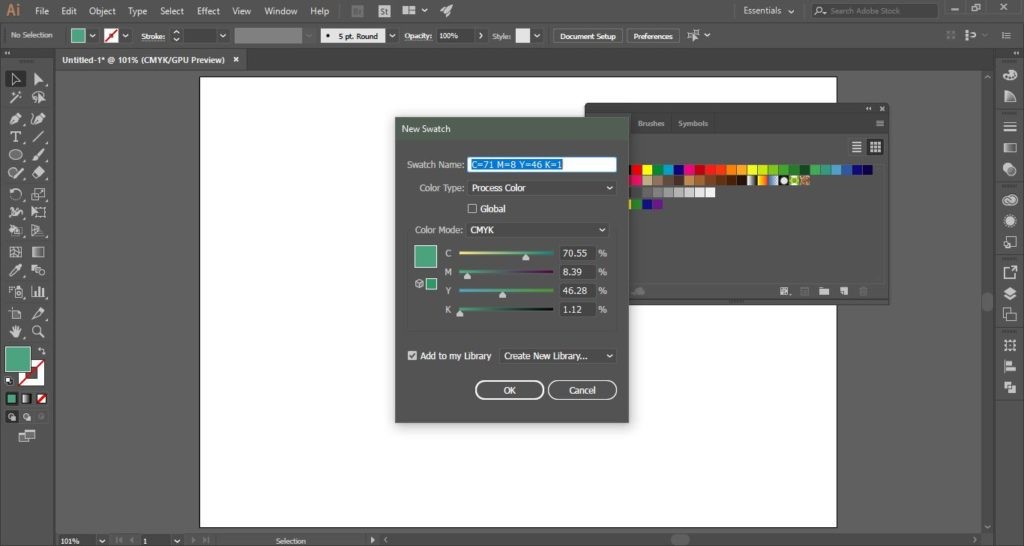
This can also be sorted into groups. Simply create a new group by clicking on the upper right-hand side options and choosing New Colour Group.
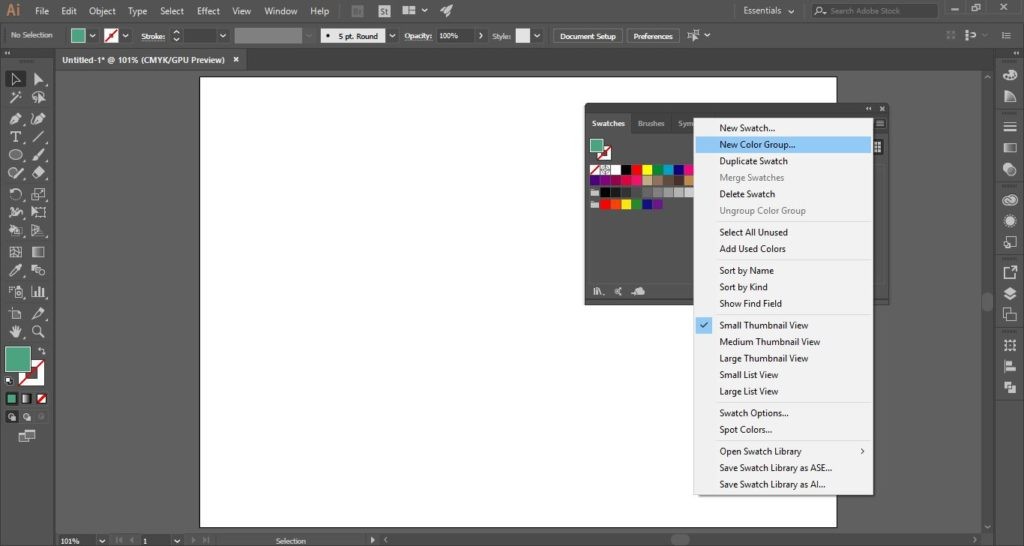
You can name your swatches for a project and edit these as you go. You can also download or create swatches you find online. We like to use Adobe Colour (https://color.adobe.com/explore) to look at new colour swatches or groups of swatches that you can easily re-create or download without having to enter the Hex code.
7. Pathfinder Tool
The pathfinder tool is a simple one in Adobe Illustrator, but it lets you play around with different shapes and basically creates either cut-outs or merges two or more shapes to become one. You can find the pathfinder panel by going to Window > Pathfinder.
Next, with two shapes as an example, we can use the different options to create completely new shapes:
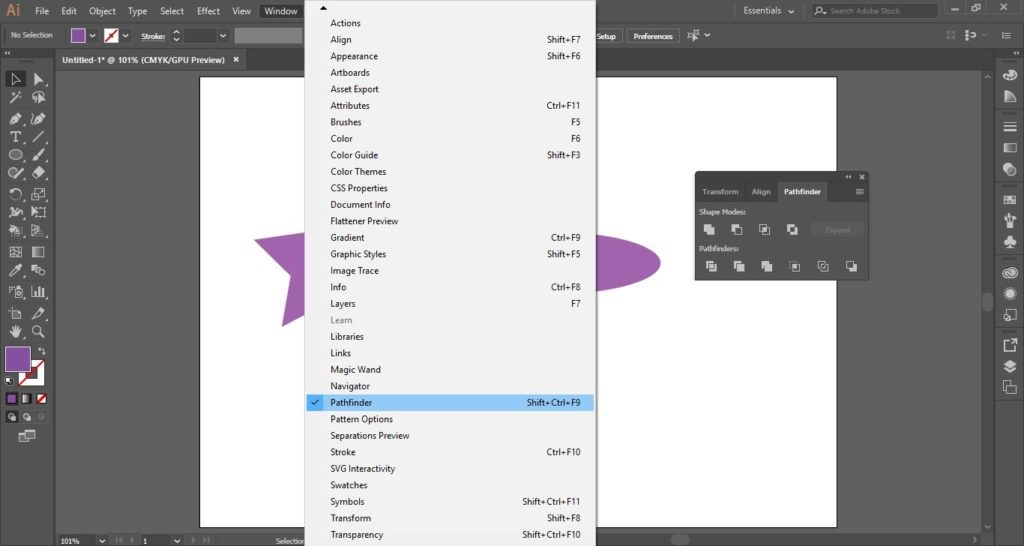
The first is to merge the two shapes. You can do this by placing one on top of each other and clicking on the merge tool.
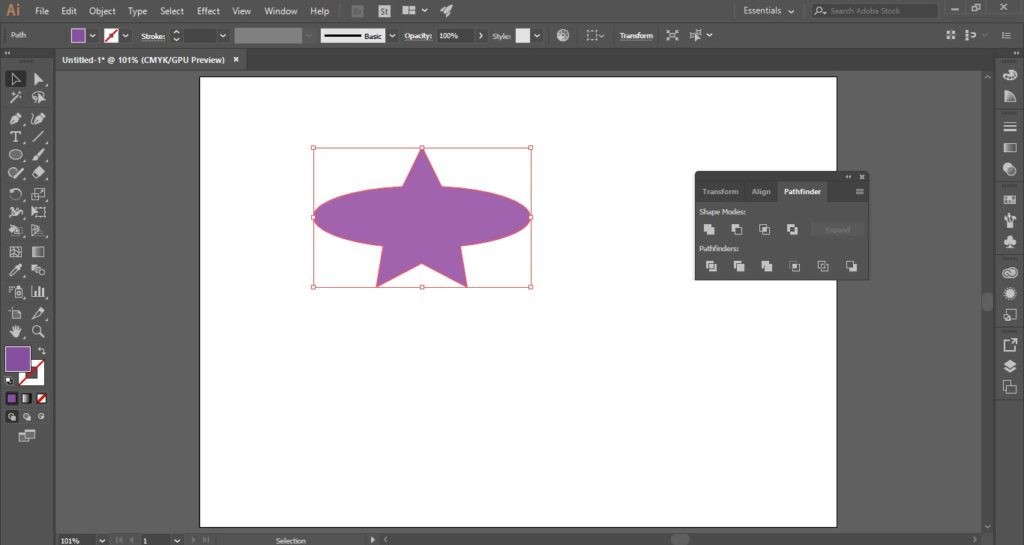
To cut out the front-most shape, click on the second option Minus Front.
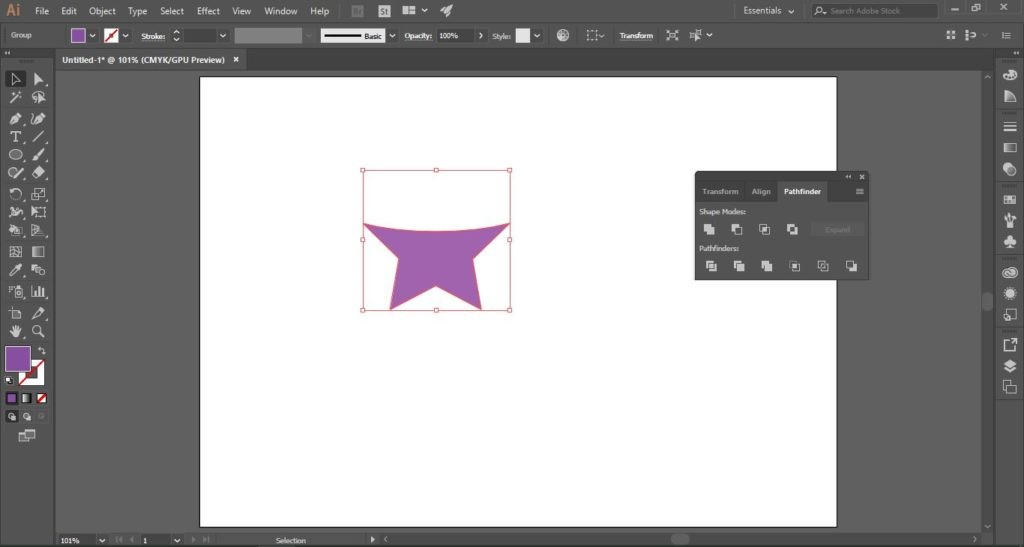
This tool is something you can play around with and figure out which options best suit your project.
8. Image Trace
Image trace is a good illustrative tool for artists or design students. It can turn sketches and images into a vectorised format making it easy to edit. Here we show you two examples of the ways in which image trace can be used.
This photo of a man can be turned into a vector with a few easy steps. We've used an image from Freepik for this example.
Hand photo created by luis_molinero.
To get your saved or scanned photo you can go to File > Place to add the image in Adobe Illustrator.
Re-scale your image and hold down the Shift key to make sureyou don’t lose the proportions.
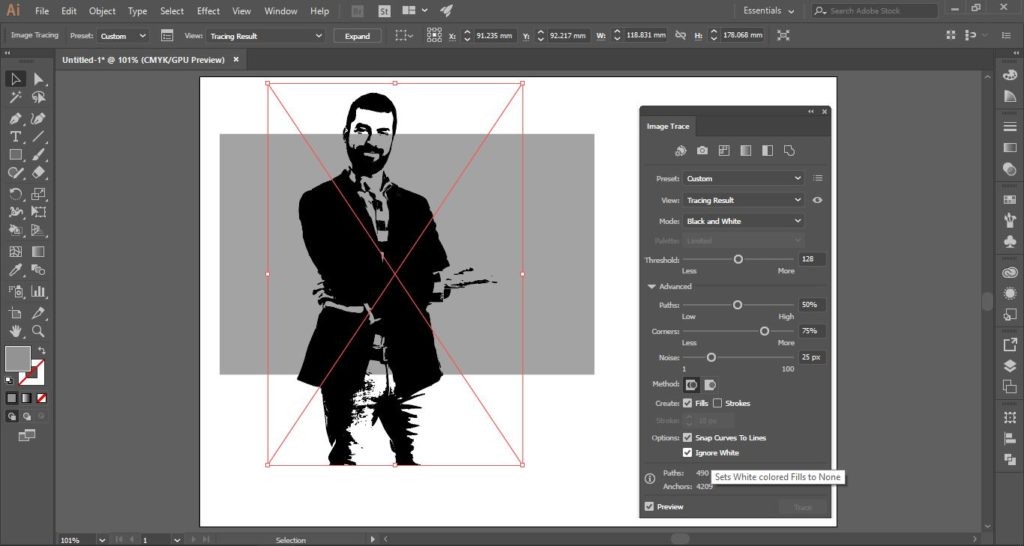
Next, on the top toolbar you can see the option to Image Trace. When you click on this, don’t be alarmed if your image disappears or becomes a hideous mess.
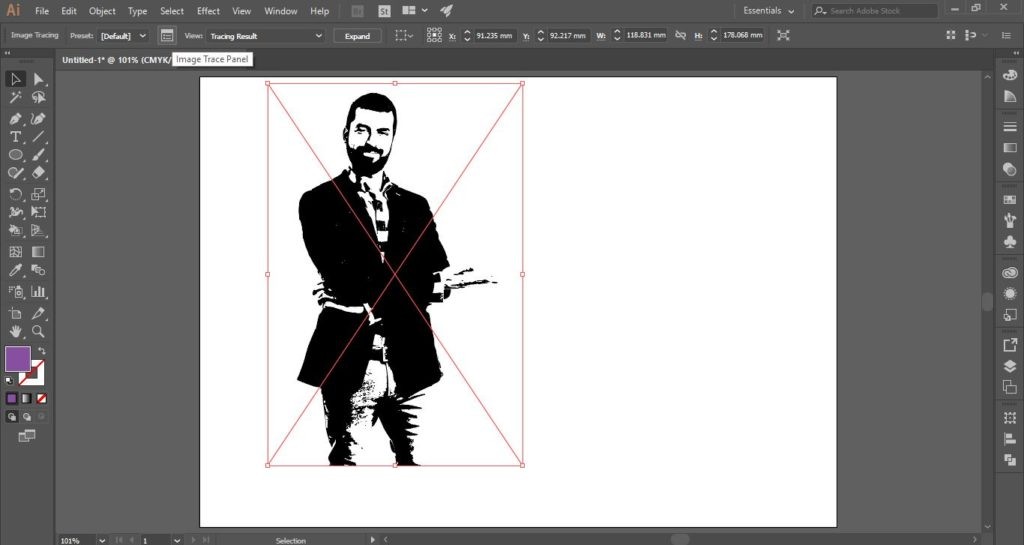
Click on the Image Trace Panel to display more options. Our photo has been turned into a silhouette image which we can further alter. We can now change the level of detail and magically get rid of the white background.
Click on the Advanced arrow and make sure the ‘Ignore White’ box is checked.
But what if you wanted to keep the colours? Or make the image not so detailed?
To do this, simply choose ‘Colour’ in the Mode drop down list. You can use the slider below to change the number of colours you want present. Essentially, the smaller number of colours means less detail.
*This is extremely helpful when creating vector people to use for architectural illustrations
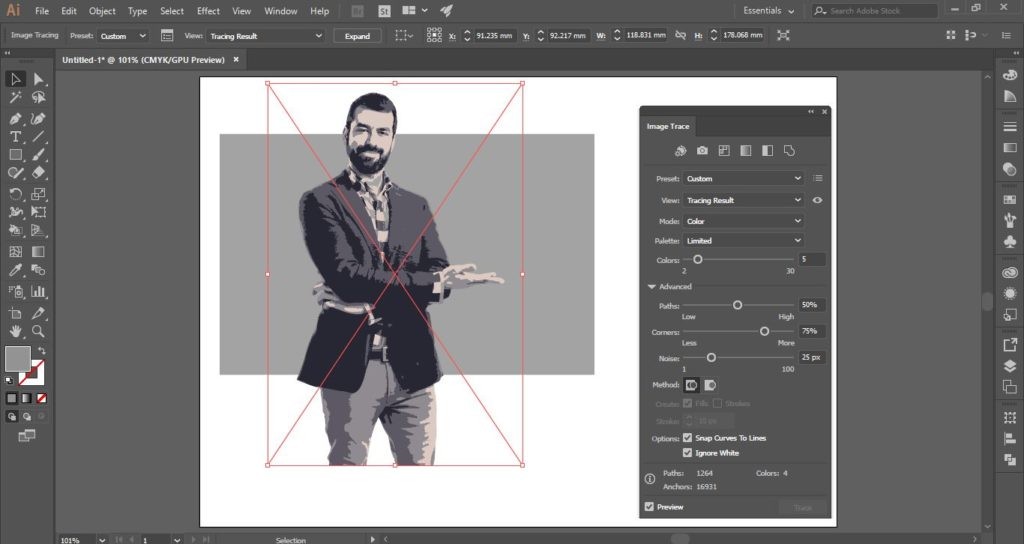
Here we have 5 colours selected as well as the Ignore Whitebox checked. However, the colours are seemingly dull and too similar. Don’t fear, we can change this too.
Click on the Expand button in the toolbar or go to Object > Live Paint > Expand. Next, using the Direct Selection Tool (A) we can click on one of the areas that we want to change.
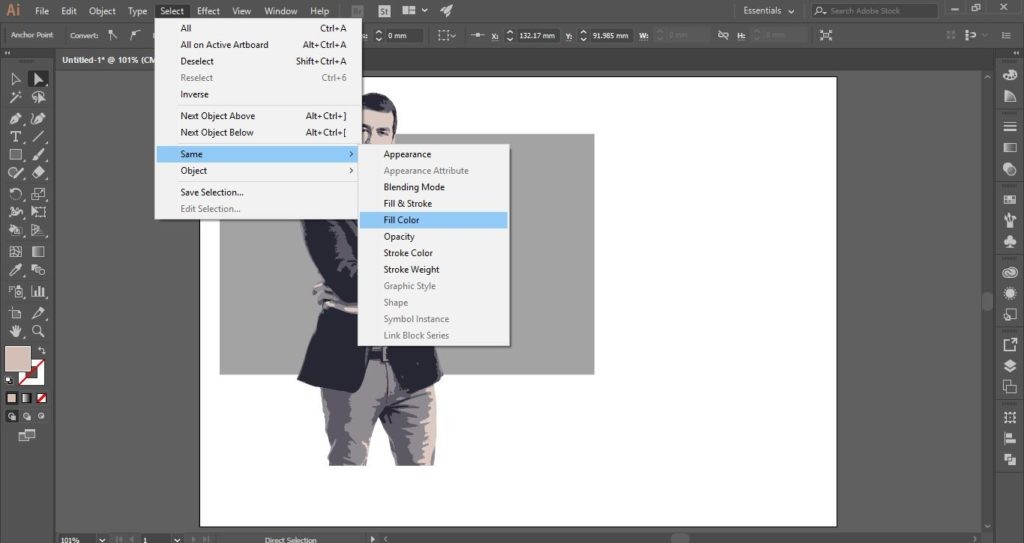
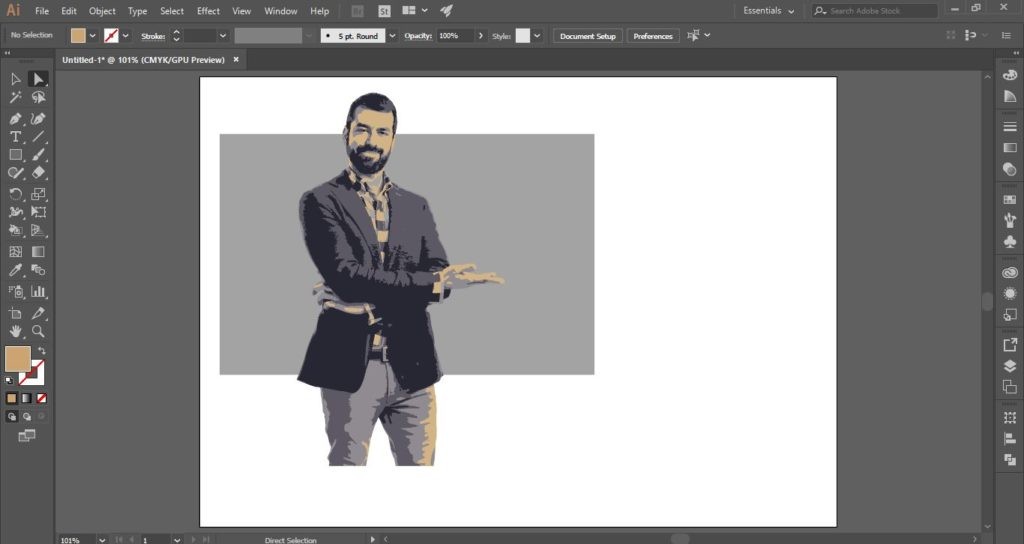
But selecting each and every area of that colour can be difficult and long. To make this easier, go to Select > Same > Fill Colour. Now all those areas are selected we can choose a new colour to replace this.
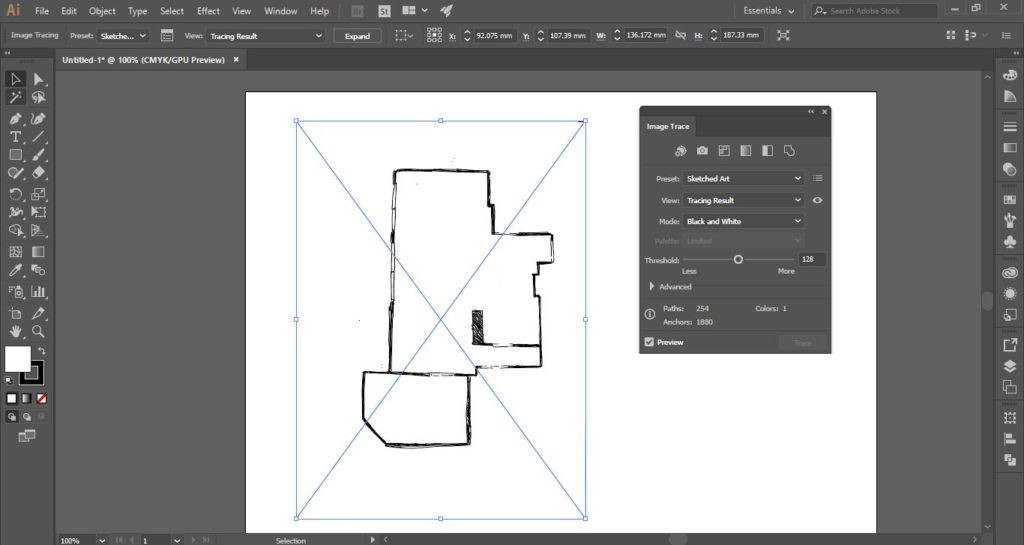
What if you wanted to Image Trace a scanned image or document? Place your image and start the Image Trace process like before.
In the Preset drop down menu, you can choose a range of different presets with different setting to suit the outcome.
Here we've used the 'sketched art' preset to get a simple plan outline.
9. Patterns
Patterns are an easy tool in Adobe Illustrator and making your own pattern allows you to fill larger areas with the same shape rather than copying and pasting it again and again.
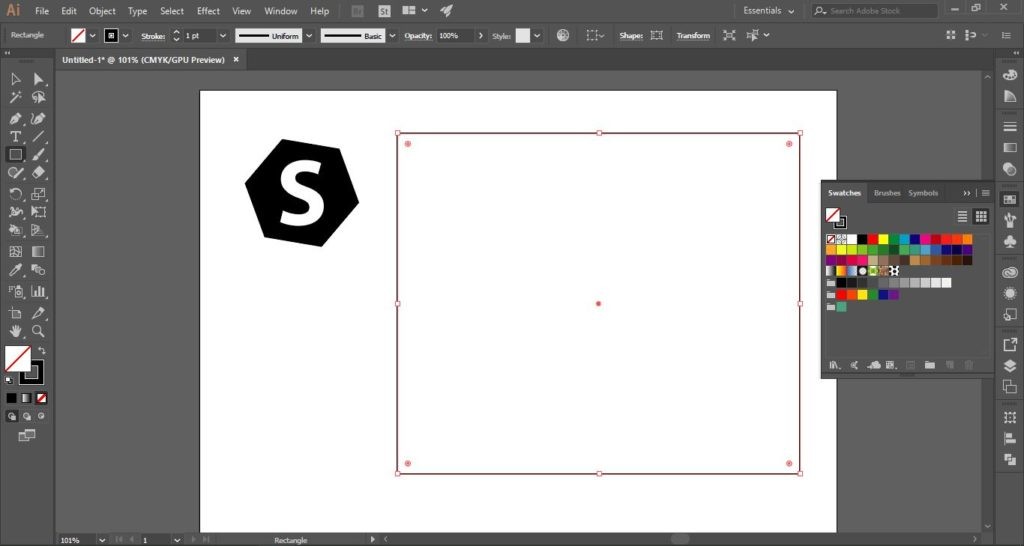
Here we have a hexagon with the letter 'S' cut out (Remember creating outlines and pathfinder cut out?) which we want to make into a pattern to fill a rectangular shape.
Select your shape with the Selection Tool (V) and go to Object > Pattern > Make.
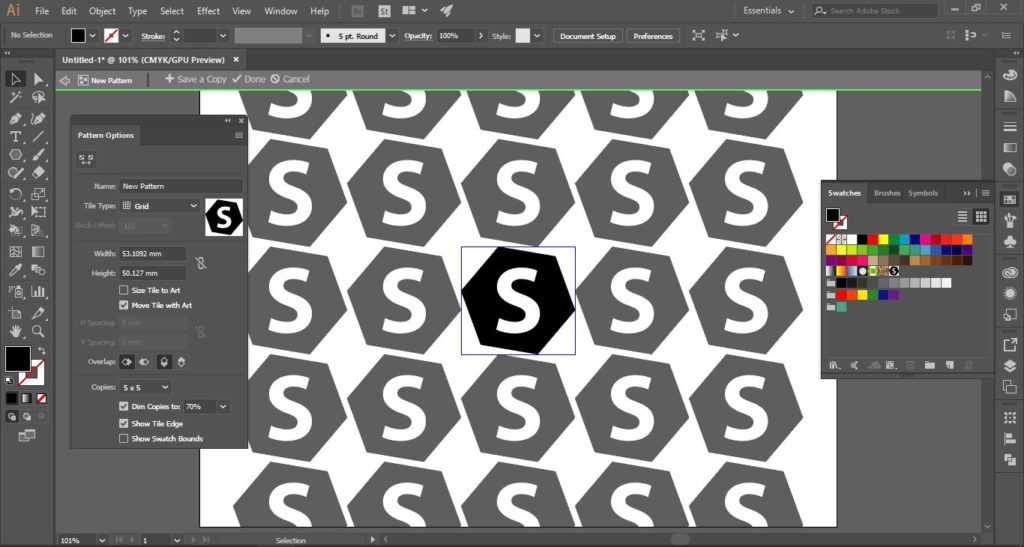
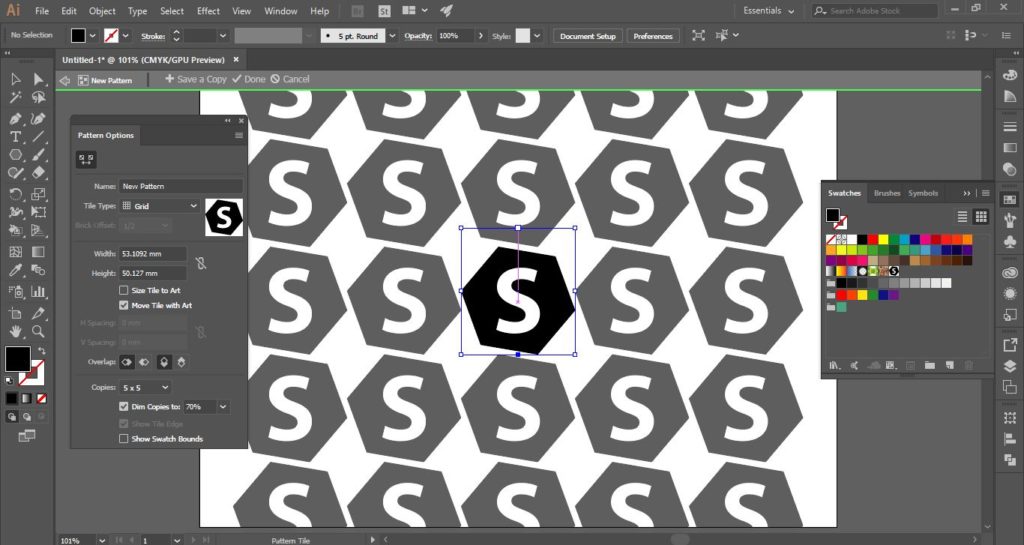
Now we can adjust the size, spacing and angle of the pattern you want to create. You can name your pattern to use in the future as this gets saved as a Swatch.
Use the Pattern Tile Tool in the top left to adjust the spacing manually.
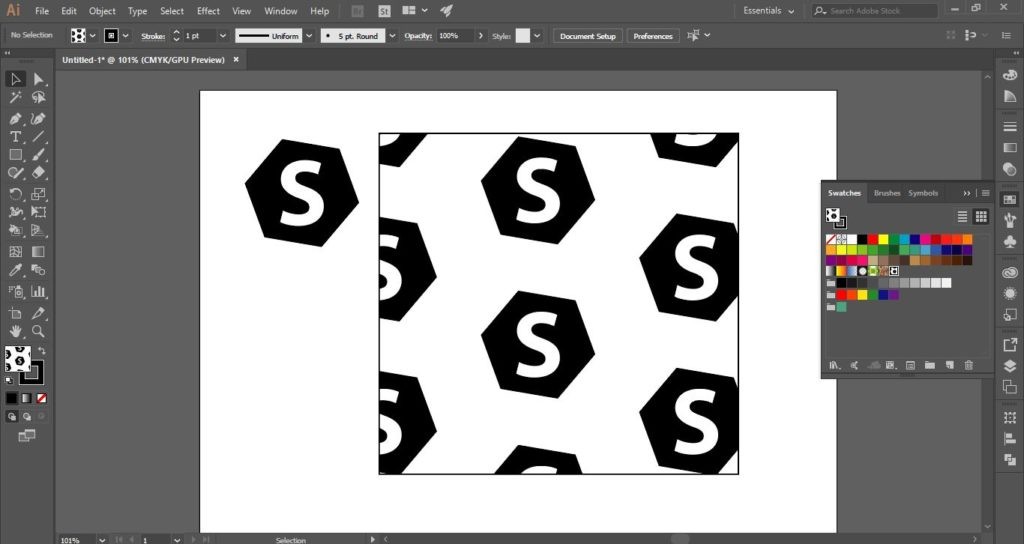
You can also use the presets to change the style of the pattern. We’re going to select ‘Brick by Column’.
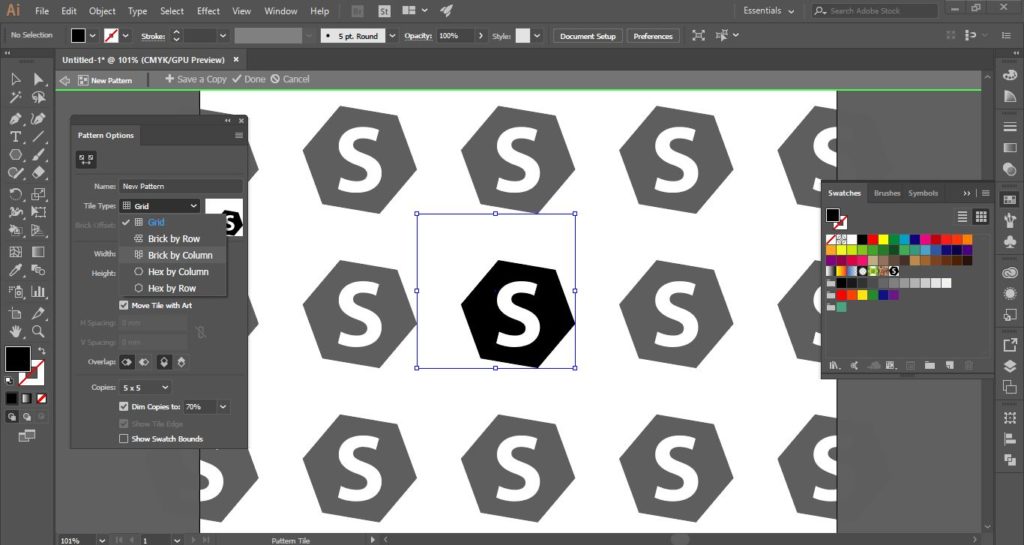
Now, you can click Done to save this as a pattern. Basically, we can use the pattern as we would any fill colour. Since it has been added to swatches, we can create a rectangle and select the swatch to fill it with our pattern.
10. Exporting
You’re all done and dusted testing out these handful of features and actually managed to create something along the way. But what now? Saving and exporting is just as important as the actual outcome.
The ‘Save As’ feature allows you to save your document as an Illustrator file (.Ai) and an Adobe PDF whereas the ‘Export' feature lets you save in a large number of formats, the most common being .png or .jpeg.
You can also save your artboards as separate images or pages in a PDF.
These 10 tools and features are just the tip of the iceberg when it comes to Illustrator but now that you’ve covered the basics we hope you turned from a newbie to someone who knows some of the ins and outs of this particular software and don’t worry if it takes a while or if along the way you make some happy accidents and reveal even more features.
Which other tools, tips and tricks do you like using in Adobe Illustrator?

